
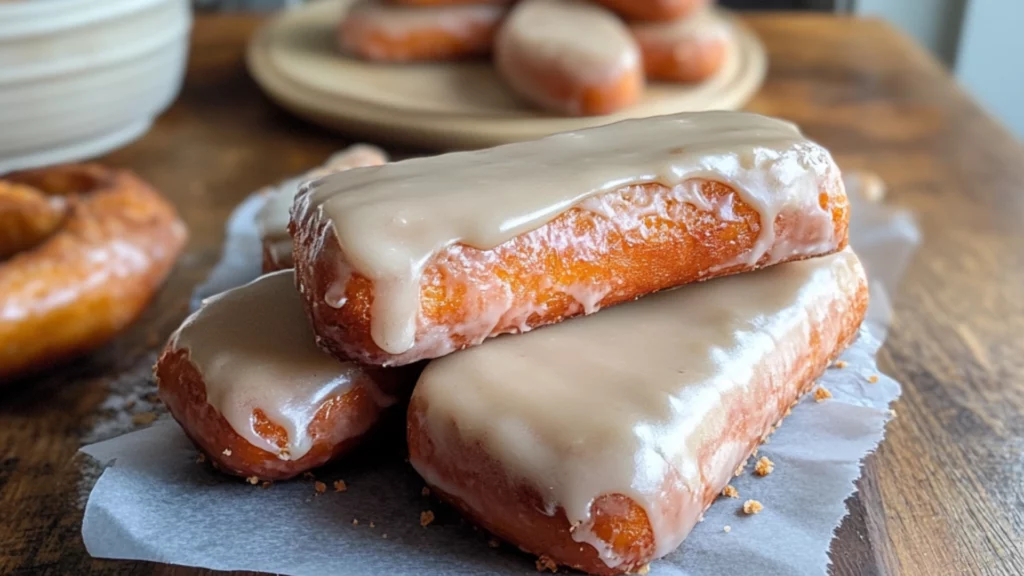
When the aroma of maple glaze meets the tender crumb of a freshly baked donut, magic happens in your kitchen. These Maple Donut Bars are everything you want in a homemade breakfast treat—soft, rich, and dripping with sweet maple flavor. Whether you’re craving a cozy weekend baking project or looking for the perfect addition to a breakfast spread, this recipe brings the comfort of a donut shop right into your home. And the best part? They’re baked, not fried, making them a slightly lighter option while still delivering that classic donut indulgence.
Inspired by the classic baked maple bars that often appear on café menus or even nostalgic trays of hospital food, this homemade version is simpler than you might think. It takes the idea of traditional maple donuts and transforms it into an easy-to-make bar form that’s ideal for slicing and sharing. Moreover, the creamy glaze brings the whole dessert together in a beautifully sticky, maple-kissed finish. If you’ve ever wanted a satisfying maple flavored dessert that doesn’t require deep frying or doughnut cutters, this is your answer.
Made with pantry staples and ready in under an hour, these bars are an excellent choice for family breakfasts, school lunches, or weekend brunches. In addition, the flavor possibilities are endless. Whether you’re adding a bit of spice, topping them with bacon, or simply keeping them classic, these maple donut bars are truly a baker’s best friend. So let’s dive into why you’ll want to make them again and again.
Table of Contents
Why Maple Donut Bars Are a Must-Bake Treat
There’s no denying the timeless appeal of Maple Donut Bars. Their distinct aroma and sweet glaze make them stand out in any bakery case, and now you can recreate that same magic at home. These maple donut bars offer the same beloved taste but in a simplified, no-fry format that is both practical and delicious. What sets them apart from ordinary cake bars is their texture—fluffy yet substantial, moist yet structured, with just the right amount of chew.
In addition to their rich maple profile, these bars also make baking donuts more accessible. You don’t need a fryer, donut pan, or piping bag. Everything bakes in one dish, cools quickly, and slices cleanly. This makes them perfect for entertaining, meal prep, or just feeding a crowd. Furthermore, they can easily be made in advance and still taste amazing the next day, making them ideal for busy mornings or planned events.
What’s more, the base recipe opens the door to creativity. You can easily customize them with spices like cinnamon or nutmeg, fold in chopped nuts, or even drizzle with chocolate for a fancy twist. In fact, those familiar with buttermilk bars donut recipes will recognize the same tender crumb and tangy undertone here. It’s a versatile base that lends itself well to any number of maple desserts you may already love.
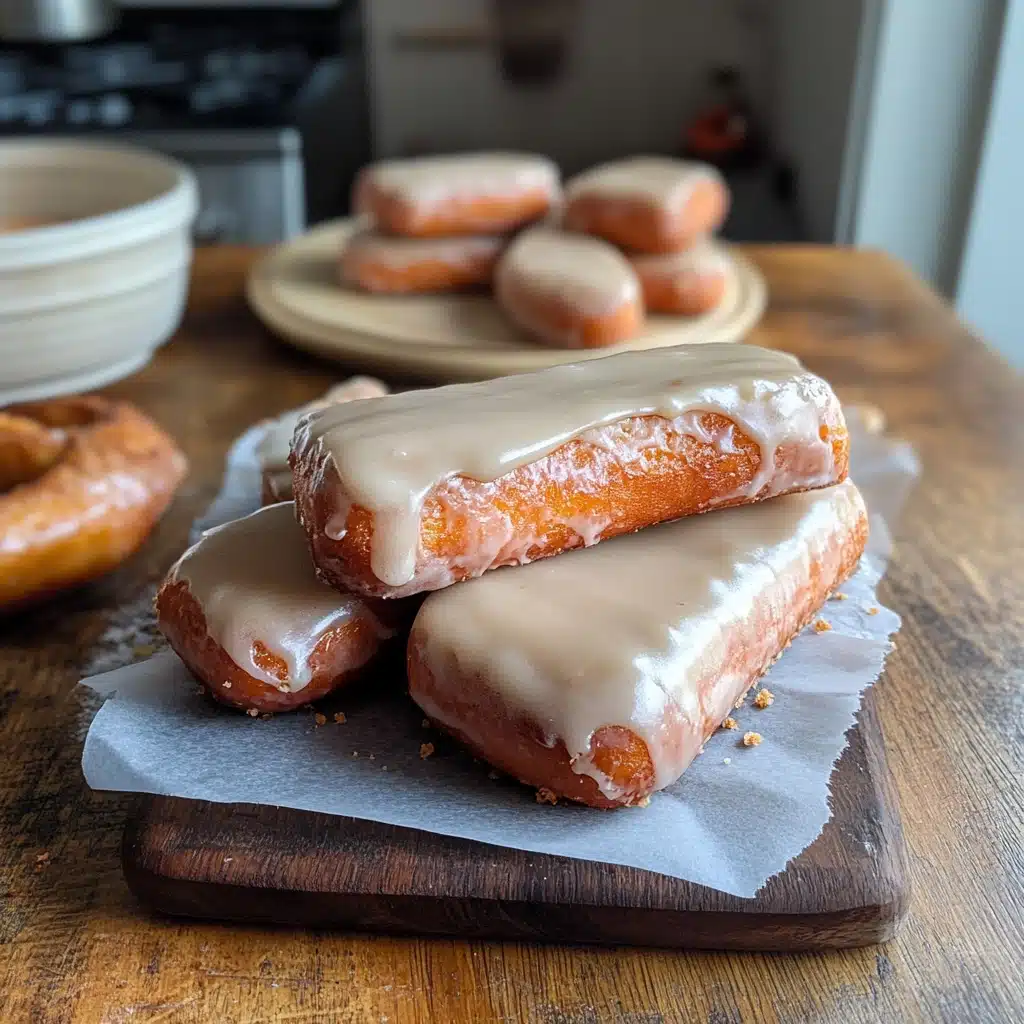
Ingredients for Maple Donut Bars
This easy, one-pan recipe uses simple ingredients, many of which you likely already have in your pantry. Each one plays a crucial role in achieving that classic donut flavor and texture:
For the donut bar base:
- 2 cups all-purpose flour
- 1 teaspoon baking powder
- 1/2 teaspoon baking soda
- 1/2 teaspoon salt
- 1/2 teaspoon ground nutmeg
- 1/2 cup unsalted butter, softened
- 1 cup granulated sugar
- 2 large eggs
- 1 cup buttermilk
- 1 teaspoon vanilla extract
For the maple glaze:
- 1/2 cup unsalted butter
- 1/2 cup brown sugar
- 1/4 cup pure maple syrup
- 1 1/2 cups powdered sugar
- 1/2 teaspoon maple extract (optional for stronger flavor)
- 1–2 tablespoons milk, to thin if needed
If you’re aiming for variation, feel free to add finely chopped nuts like pecans or walnuts to the batter. Alternatively, a sprinkle of sea salt over the glaze can elevate the sweetness with a hint of contrast. For maple lovers exploring various maple recipes, this ingredient list will feel both familiar and exciting.
Tools and Equipment Needed
You won’t need any advanced tools or complicated equipment for this recipe, which is great for beginner bakers. Here’s what you’ll want to have on hand:
- Mixing bowls (large and medium)
- Hand mixer or stand mixer
- Measuring cups and spoons
- 9×13-inch baking dish
- Parchment paper or nonstick spray
- Saucepan for the glaze
- Whisk or silicone spatula
- Wire cooling rack
- Offset spatula or butter knife for spreading glaze
Using basic tools means less cleanup and fewer barriers to enjoying your freshly baked maple donut bars.
How to Make Maple Donut Bars (Step-by-Step)
Making your own maple donuts in bar form is easier than you think. Just follow these step-by-step instructions and you’ll be slicing into soft, maple-glazed goodness in no time.
- Preheat your oven to 350°F (175°C) and line a 9×13-inch baking pan with parchment paper or spray it generously with nonstick cooking spray.
- Mix the dry ingredients. In a medium bowl, whisk together flour, baking powder, baking soda, salt, and nutmeg.
- Cream the butter and sugar. In a large bowl, beat the softened butter with the granulated sugar until light and fluffy. This should take about 3 minutes.
- Add the eggs one at a time, beating well after each addition. Stir in the vanilla extract.
- Alternate the dry ingredients with the buttermilk. Add half the flour mixture to the wet ingredients, mix until just combined, then add half the buttermilk. Repeat with the remaining flour and buttermilk, mixing only until smooth.
- Pour the batter into your prepared pan and smooth the top with a spatula. Bake for 25–28 minutes, or until a toothpick inserted into the center comes out clean.
- Cool the bars completely on a wire rack while you prepare the glaze.
- Make the maple glaze. In a small saucepan over medium heat, melt the butter. Add brown sugar and maple syrup, stirring until the sugar dissolves. Remove from heat and whisk in powdered sugar and maple extract. If the glaze is too thick, add a splash of milk.
- Spread the warm glaze over the cooled bars using an offset spatula or the back of a spoon. Let the glaze set for about 10 minutes before slicing.
These bars are best enjoyed fresh but also taste great the next day. Their soft texture and rich flavor make them an easy winner for breakfast or dessert.
Tips for the Best Maple Bars Texture and Flavor
Getting the most out of your maple donut bars means paying attention to a few small but important details:
- Use room temperature ingredients for even mixing and better texture.
- Don’t overmix the batter once you add the flour—it can lead to dense bars.
- Use pure maple syrup for the glaze to capture that authentic flavor.
- Add a touch of maple extract if you want the glaze to really pop.
- Glaze while still warm so it spreads easily but cool the bars first to avoid melting.
These tips help ensure your bars are light, flavorful, and balanced between sweetness and depth.
Common Mistakes to Avoid
Even simple recipes can go awry. Here are the most common mistakes to avoid with maple donut bars:
- Overbaking. This will dry out your bars. Check at the 25-minute mark.
- Too much glaze. It may sound odd, but an overly thick glaze can overpower the soft base.
- Skipping the buttermilk. It adds both moisture and tang—regular milk won’t give the same result.
- Using artificial syrup without balance. If you use pancake syrup, balance it with a dash of salt or real extract to avoid overly sugary results.
Being mindful of these will help you achieve the perfect bakery-style result at home.
Maple Bar Variations and Add-Ins
Want to make these bars your own? Here are a few ideas that elevate them into something truly special:
- Add a sprinkle of bacon to the glaze for that sweet-savory contrast.
- Fold in chopped pecans or walnuts for a nutty crunch.
- Top with chocolate drizzle to create a maple mocha treat.
- Dust with cinnamon sugar before baking for added warmth.
- Swap the glaze for a cream cheese maple frosting if you prefer a thicker topping.
These ideas transform a simple bar into a personalized version of your favorite maple desserts or doughnut recipe easy.
Serving Suggestions
These bars are incredibly versatile. They shine on a brunch table alongside fresh fruit and coffee or as a sweet bite for afternoon tea. Their soft texture and familiar flavor make them appealing to kids and adults alike. If you remember the sweet, glazed maple donuts often served as hospital food, these bars may spark a bit of nostalgic joy—but this time, with a homemade twist.
Try serving them:
- With hot coffee for a bakery-style breakfast
- Cut into mini squares for party platters
- Warmed with a scoop of vanilla ice cream for dessert
- Packaged in wax paper for lunchboxes or snacks on the go
Their appeal lies in their flexibility and crowd-pleasing nature.
How to Store and Reheat Maple Donut Bars
Keeping your maple donut bars fresh is easy with proper storage:
- At room temperature: Store in an airtight container for up to 3 days.
- In the fridge: Store for up to 5 days. Reheat briefly in the microwave.
- In the freezer: Freeze glazed or unglazed bars for up to 2 months. Thaw and warm slightly before serving.
The bars maintain their flavor well, and the glaze stays smooth after reheating—making this a fantastic recipe for advance baking.
Frequently Asked Questions (FAQ)
Can I use regular milk instead of buttermilk?
You can, but the texture and flavor won’t be as rich. A DIY version using milk and lemon juice works in a pinch.
What if I don’t have maple extract?
It’s optional. Use high-quality maple syrup for strong flavor or increase the amount slightly.
Can I make these gluten-free?
Yes, using a 1:1 gluten-free flour blend usually works well in bar recipes.
Are these the same as maple long johns?
They share similar flavors, but maple long johns are yeast-raised and fried, while these are baked and cake-based.
Can I use margarine instead of butter?
Technically yes, but the flavor won’t be as rich or authentic.
Final Thoughts + Call to Action
These maple donut bars are the definition of cozy comfort. They combine the familiar flavors of your favorite maple donuts with the ease of a doughnut recipe easy enough for any day of the week. Whether you remember similar treats from the hospital food trays of childhood or you’re diving into the world of maple flavored desserts for the first time, this recipe is guaranteed to satisfy.
With a soft, cake-like base and a silky glaze that sets just enough to slice beautifully, these bars are perfect for sharing or keeping all to yourself. If you’re passionate about maple recipes or always on the lookout for new baked maple bars, this one will become a household favorite.
Try baking a batch this weekend and see just how easy homemade indulgence can be. And if you enjoyed this recipe, don’t forget to share it with friends and family, and subscribe to our blog for more sweet ideas and kitchen-tested favorites.
Prep Time: 15 minutes
Cook Time: 28 minutes
Total Time: 43 minutes
Servings: 12 bars
Calories: Approximately 330 kcal per bar

7 Irresistible Maple Donut Bars You’ll Crave All Year Long
- Total Time: 43
- Yield: 12 1x
Description
These maple donut bars are baked, soft, and glazed with rich maple flavor—perfect for breakfast or dessert.
Ingredients
For the donut bar base:
-
2 cups all-purpose flour
-
1 teaspoon baking powder
-
1/2 teaspoon baking soda
-
1/2 teaspoon salt
-
1/2 teaspoon ground nutmeg
-
1/2 cup unsalted butter, softened
-
1 cup granulated sugar
-
2 large eggs
-
1 cup buttermilk
-
1 teaspoon vanilla extract
For the maple glaze:
-
1/2 cup unsalted butter
-
1/2 cup brown sugar
-
1/4 cup pure maple syrup
-
1 1/2 cups powdered sugar
-
1/2 teaspoon maple extract (optional for stronger flavor)
-
1–2 tablespoons milk, to thin if needed
Instructions
-
Preheat your oven to 350°F (175°C) and line a 9×13-inch baking pan with parchment paper or spray it generously with nonstick cooking spray.
-
Mix the dry ingredients. In a medium bowl, whisk together flour, baking powder, baking soda, salt, and nutmeg.
-
Cream the butter and sugar. In a large bowl, beat the softened butter with the granulated sugar until light and fluffy. This should take about 3 minutes.
-
Add the eggs one at a time, beating well after each addition. Stir in the vanilla extract.
-
Alternate the dry ingredients with the buttermilk. Add half the flour mixture to the wet ingredients, mix until just combined, then add half the buttermilk. Repeat with the remaining flour and buttermilk, mixing only until smooth.
-
Pour the batter into your prepared pan and smooth the top with a spatula. Bake for 25–28 minutes, or until a toothpick inserted into the center comes out clean.
-
Cool the bars completely on a wire rack while you prepare the glaze.
-
Make the maple glaze. In a small saucepan over medium heat, melt the butter. Add brown sugar and maple syrup, stirring until the sugar dissolves. Remove from heat and whisk in powdered sugar and maple extract. If the glaze is too thick, add a splash of milk.
-
Spread the warm glaze over the cooled bars using an offset spatula or the back of a spoon. Let the glaze set for about 10 minutes before slicing.
Notes
-
Overbaking. This will dry out your bars. Check at the 25-minute mark.
-
Too much glaze. It may sound odd, but an overly thick glaze can overpower the soft base.
-
Skipping the buttermilk. It adds both moisture and tang—regular milk won’t give the same result.
-
Using artificial syrup without balance. If you use pancake syrup, balance it with a dash of salt or real extract to avoid overly sugary results.
- Prep Time: 15
- Cook Time: 28
- Category: DESSERT
- Cuisine: AMERICAN
Nutrition
- Serving Size: 12
- Calories: 330


